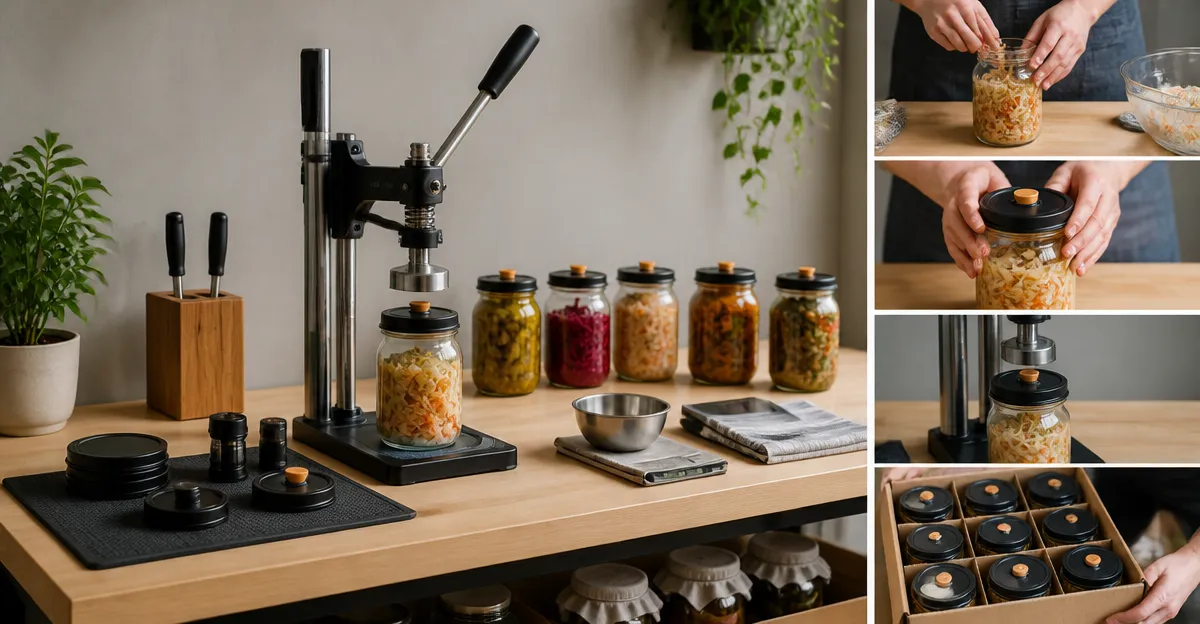
How to Build an Ergonomic Jar Capping and Packing Station for Home Fermenters
Introduction
Home fermenters often require a reliable method to seal glass jars quickly and consistently. This guide explains how to construct an ergonomic capping and packing station that maximizes safety, reduces fatigue, and preserves the quality of fermented products. Readers will learn how to select appropriate equipment, arrange the workspace, and apply best‑practice techniques for efficient sealing. The information is valuable because a well‑designed station can extend shelf life, improve product appearance, and increase overall production capacity.
What You'll Need
The following materials and tools are recommended for a complete station. Each item is linked to an Amazon product page for convenient purchase. The list includes both essential machinery and auxiliary accessories that support ergonomics and workflow.
- Vacuum capping machine – Banfluxion Glass Jar Vacuum Capping Machine
- Alternative dual‑station cappers – WYDDDARY Semi‑Auto Vacuum Capping Machine or EQCOTWEA Glass Jar Vacuum Capper
- Manual lever capper for low‑volume tasks – Manual Bottle Capping Machine
- Sturdy workbench with adjustable height
- Anti‑fatigue floor mat
- LED task lighting with adjustable arm
- Safety goggles and ear protection
- Cable management clips and power strip
Step 1 – Prepare the Workspace
Begin by selecting a well‑ventilated area near a power outlet. Place a sturdy workbench that can be raised to waist level to reduce bending; an adjustable‑height bench allows the operator to maintain a neutral spine. Lay an anti‑fatigue mat on the floor to absorb impact and minimise leg strain during prolonged operation. Install LED task lighting on an articulating arm so that the capping area remains evenly illuminated without glare.
Arrange the power strip on the bench edge and secure cables with clips to prevent tripping hazards. Keep safety goggles and ear protection within easy reach, as the pneumatic components of vacuum cappers generate audible noise and occasional debris. This initial setup establishes a safe, ergonomic foundation for the subsequent steps.
Step 2 – Select and Position the Vacuum Capping Machine
For most home fermenters, a semi‑automatic vacuum capping machine provides the optimal balance between speed and control. The Banfluxion Glass Jar Vacuum Capping Machine offers a 7‑inch touch screen, adjustable capping height, and a foot‑switch for hands‑free operation. Its price of $2,999.00 reflects a robust construction with a net weight of 62 kg, making it stable on a reinforced bench.
Position the machine at the centre of the bench, leaving at least 30 cm of clearance on each side for bottle handling. Connect the machine to the power strip and verify that the voltage matches the local supply (110 V, 60 Hz). The machine’s adjustable height feature, controlled by a handwheel, should be set to the midpoint (approximately 135 mm) before the first run, allowing quick fine‑tuning for different jar dimensions.
If higher throughput is required, consider the dual‑station alternatives such as the WYDDDARY Semi‑Auto Vacuum Capping Machine ($2,899.00) or the EQCOTWEA Glass Jar Vacuum Capper ($2,899.00). Both provide two capping stations, effectively halving the interval between bottles and increasing overall sealing speed.
Step 3 – Configure the Capping Parameters
Power on the machine and access the touch screen interface. Set the vacuum pressure to the recommended level for the specific jar size; a typical setting for 480 ml jars is 0.8 bar. Adjust the sealing time to 3–4 seconds, ensuring that the metal cap is fully seated without excessive force. The machine stores these parameters, allowing the operator to recall them for future batches with a single tap.
Use the foot‑switch to initiate the vacuum‑capping cycle once a jar and cap are placed on the platform. The foot‑switch frees both hands, enabling the operator to load the next jar while the previous one is being sealed, thereby improving productivity. Observe the real‑time status on the display to confirm that each cycle completes without error.
Step 4 – Implement a Jar Feeding System
To minimise repetitive motion, create a simple feeding rack that holds jars at waist height. Use a wooden or metal frame with slots spaced to accommodate the 2.7 in (70 mm) bottle mouth diameter specified by all recommended machines. Position the rack directly in front of the capping platform so that the operator can slide a jar into place with minimal reach.
If the production volume exceeds 20 jars per hour, a gravity‑fed hopper can be added. The hopper should release one jar at a time onto the feeding rack, allowing the operator to focus on cap placement and foot‑switch activation. This arrangement reduces shoulder strain and maintains a steady workflow.
Step 5 – Integrate a Packing Area
Immediately after sealing, jars should be transferred to a designated packing zone to prevent accidental breakage. Place a sturdy tray or rolling cart adjacent to the capping machine, ensuring that the distance does not exceed 60 cm. Label the tray with the batch name and sealing date to facilitate inventory tracking.
For larger batches, consider a small conveyor belt with a gentle slope. The belt can be powered by a low‑voltage motor and synchronized with the capping cycle using a simple relay. This optional automation further reduces manual handling and preserves the ergonomic benefits of the station.
Step 6 – Perform Routine Maintenance
Schedule a weekly inspection of the vacuum pump, pneumatic hoses, and sealing dies. Clean the contact surfaces with a food‑grade sanitizer to prevent cross‑contamination between batches. Lubricate moving parts with a silicone‑based grease compatible with food‑processing equipment.
Check the foot‑switch and touch screen for wear; replace the foot‑switch pad if it becomes slippery. Record maintenance activities in a logbook placed on the bench, noting the date, performed tasks, and any observed anomalies. Consistent maintenance extends the machine’s service life and ensures reliable sealing performance.
Tips & Pro Tips
- Use a magnetic strip on the bench to hold metal caps temporarily; this prevents caps from rolling away during high‑speed operation.
- Adjust the lighting angle to eliminate shadows on the touch screen, which can cause misreadings of parameters.
- When sealing acidic foods such as sauerkraut, increase the vacuum time by 1 second to compensate for gas release during fermentation.
- Employ a calibrated torque wrench to verify that the metal caps achieve the manufacturer‑specified sealing force.
- For occasional low‑volume tasks, the Manual Bottle Capping Machine provides a cost‑effective alternative without electricity.
Troubleshooting
Problem: Incomplete vacuum seal leading to leakage.
Solution: Verify that the bottle mouth is clean and free of residue. Increase the vacuum pressure by 0.1 bar and ensure the sealing die is properly aligned. If leakage persists, inspect the pump for wear and replace the sealing gasket.
Problem: Caps are not fully seated.
Solution: Reduce the bottle height setting on the handwheel to allow the cap to engage more directly. Check that the cap size matches the 2.7 in (70 mm) specification; mismatched caps cause misalignment.
Problem: Excessive noise from the pneumatic system.
Solution: Install vibration‑absorbing pads under the machine base and ensure that all hose connections are tight. Regularly lubricate pneumatic cylinders to reduce friction.
Conclusion
By following the steps outlined in this guide, one can construct an ergonomic jar capping and packing station that enhances productivity, safeguards health, and preserves the quality of home‑fermented goods. The recommended vacuum capping machines provide precise control, while thoughtful workspace design reduces physical strain. Continuous maintenance and adherence to best‑practice tips will ensure long‑term reliability. Readers are encouraged to adapt the layout to their specific space and production goals, thereby creating a customized solution that supports their fermentation hobby.
Products Mentioned in This Guide
Frequently Asked Questions
What equipment is essential for building an ergonomic jar capping station?
A vacuum jar capping machine, a sturdy workbench, and ergonomic accessories like anti‑fatigue mats and adjustable clamps are essential.
How does an ergonomic capping station improve fermentation quality?
It ensures consistent seals, reduces contamination risk, and minimizes jar handling fatigue, preserving flavor and extending shelf life.
Can I use a dual‑station capper for home fermenting?
Yes, dual‑station cappers increase throughput and allow simultaneous sealing of multiple jars, ideal for larger batches.
What safety features should I include in my jar capping setup?
Install a stable base, use safety guards on moving parts, and keep the workspace well‑lit with slip‑resistant flooring.
How do I arrange the workflow for efficient jar packing after capping?
Place sealed jars on a rolling cart next to the capping machine, then move them to a labeling station to streamline the packing process.